Chapter III - Tonal effects in machine stitchery
This part of the module has taken me many weeks :( I started the new chapters with enthusiasm, but not long after, my trusty 27 year old Elna bit the dust and stopped play. But, on the positive side, I bought a shiny new computerised Brother (sorry David!) that even threads its own needle! A big bonus when your eyesight is starting to dim a little like mine!

I've been learning the ins and outs of the machine - had a few stumbling blocks (see notes further on!), but in general I am well pleased with its capabilities.
The samples
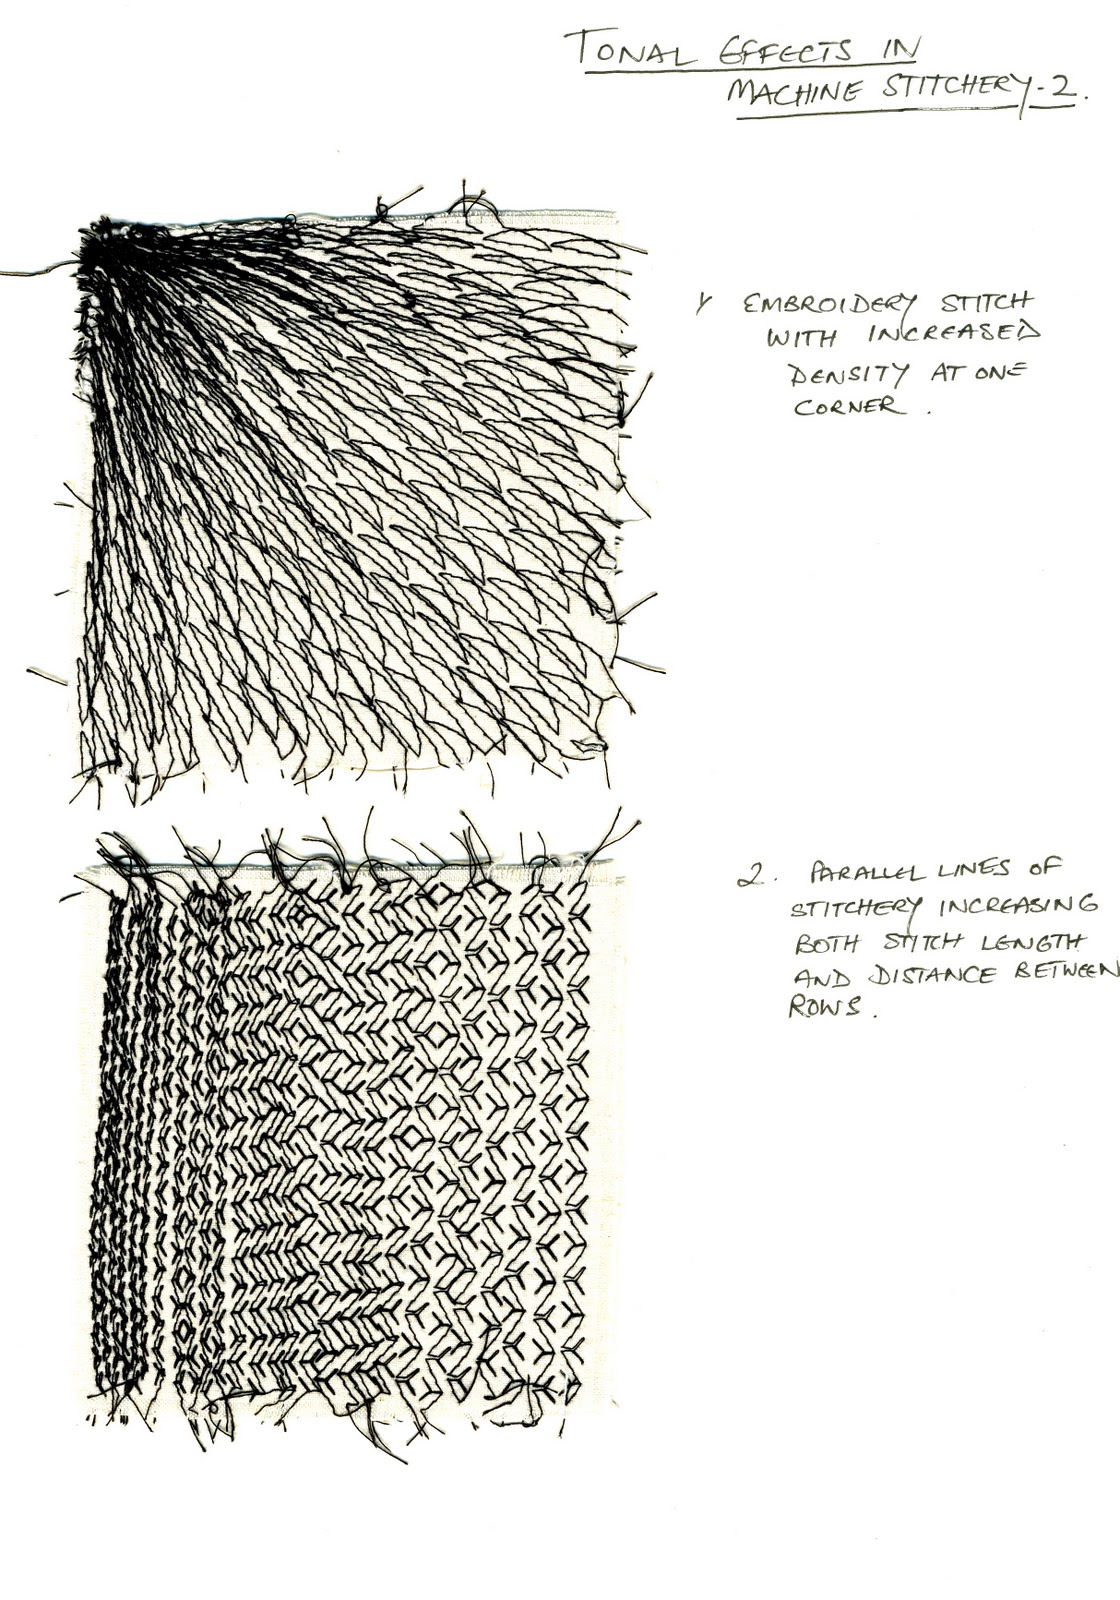
The following stitched samples are 10 x10cm utilizing black thread and various stitches in different lengths and widths, as well as differing distances between the rows to create tonal change.

NB You can click any image to view in the Blogger image viewer from which you should be able to right click (pc) or control click (mac) again to view an enlarged version.

Machined Whipstitch

And this is only a small portion of the trial runs!


The bobbin with screwdriver at the ready

Top

Reverse of the fabric


Above is another Whipstitch sample together with one in Cable Stitch, which is created with thicker threads/yarns hand wound onto the bobbin with the bottom tension adjusted.


As you can see it took me many attempts to get the tension right!

And this excerpt from my notebook shows a little of my frustration with the process!

Sewn with Perle thread.


The final page shows a group of cablestitched samples with thicker threads and yarn.

When you get it right it's a lovely effect!

Machine Stitched Bands
For the following section of work I have looked at my previously machined samples and considered how to utilize some of these methods to create animal-like markings. I cut strips of fabric 4 x 30 cms and stitched these with various threads, varying stitch length and width and creating density of tone in some areas by overlapping the stitchery. Decorative stitching like this will be used with decorated fabrics later in the final chapters of the module in the creation of a functional, 3-dimensional item.

Created with adjusted stitch length and width

Adjusted stitch length, width and overlapping.
Chapter IV - Drawing Patterns from Animal Markings
I had collected images of animals for the montage I made as part of the preliminary work in this module. For this chapter I enlarged and made some negative versions of the images to enable me to see the markings more clearly. I then focused on specific areas and created patterns with linear and tonal drawings. I also wrote a list of descriptive words to accompany each animal.


That's all for now. I'm off to create some patterned paper and fabrics!


